Devices | Virtual Devices Tab (Development View Only)
This tab is only available in the development view of the Ayla Customer Dashboard and is used to create and test devices before updates are pushed to installed devices. When a virtual device is created, it is added to this tab and appears in the All Devices tab. The following details are provided on this tab:
- Connection Status
- Red icon - the device is not connected to Ayla Cloud.
- Green icon - the device is connected to Ayla Cloud.
- Gray icon -the device has not connected to Ayla Cloud and is not activate.
- ID - the Ayla-assigned ID provided when you registered the device.
- DSN - the customer Device Serial Number.
- Product Name - a user-friendly device name.
- Model - the model number of the Ayla module.
- OEM Model - the model number of the customer's host application board.
- SW Version - the software version associated with the device.
- User - the Mac Address of associated with the device. You can click on the information in this field to open the Details tab of the User page for this particular user.
|
|
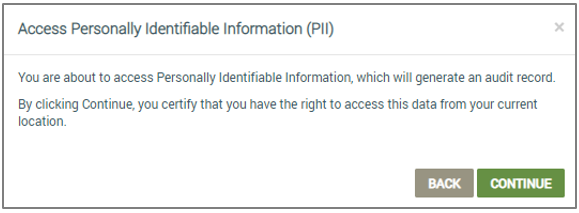
If you are a customer in the EU, the GDPR (privacy) feature should be enabled so that Personal Identifiable Information (PII) is not shown in the dashboard. When GDPRGeneral Data Protection Regulation is enabled, you must click continue in the message box that displays (example shown below) to open the User page. |

- Connected At (UTC) - the time the device last connected to the Ayla Cloud.
There are two navigational aids to find virtual devices:
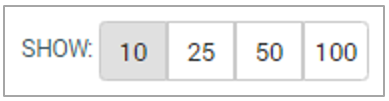
- Use the Show option (shown below) to display more virtual device on the page.
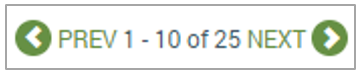
- Use the page navigational tool (shown below) to display a new list of virtual devices.
This tab also enables you can accomplish the following actions related to your virtual devices:
- Click the CREATE VIRTUAL DEVICE button to open the Create Virtual Device dialog box:
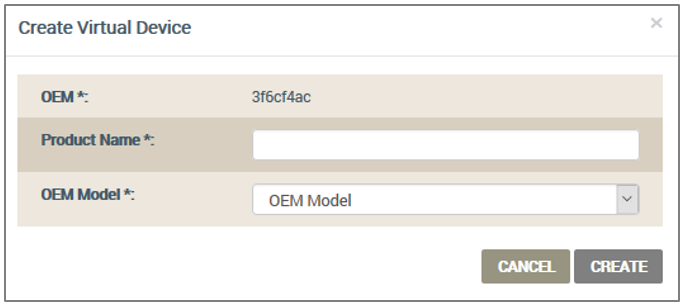
- For Product Name, enter a user-friendly device name.
- For OEM Model, click the model number of the host application board in the drop-down list.
- Click CREATE to add the new device to the Virtual Devices tab, or CANCEL to close the dialog box without saving any information.
- Click the checkbox in the entry for the device on the Virtual Device tab.
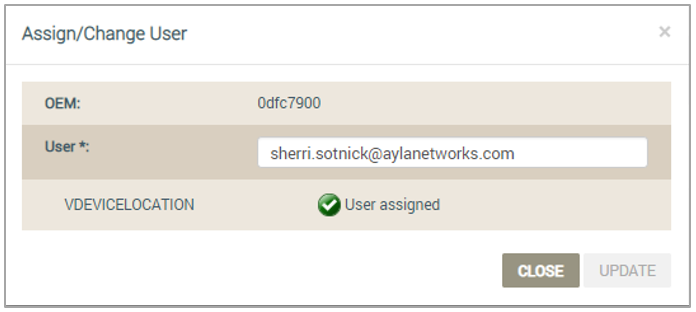
- Click the ASSIGN/CHANGE USER button to open the Assign/Change User dialog box:
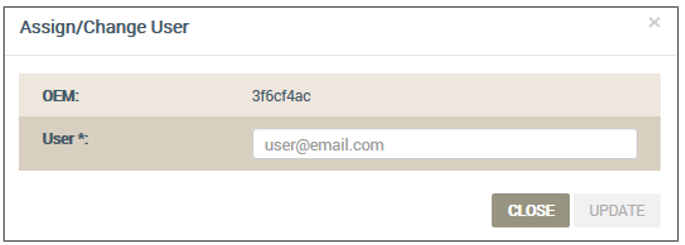
- Enter the user email.
- Click UPDATE , which displays a confirmation that the user has been assigned to this virtual device (example shown below).
- Click CLOSE.
- Click the checkbox for the entry of the device on the Virtual Device tab.
- Click the RESET DEVICE button to open the Reset Device dialog box:
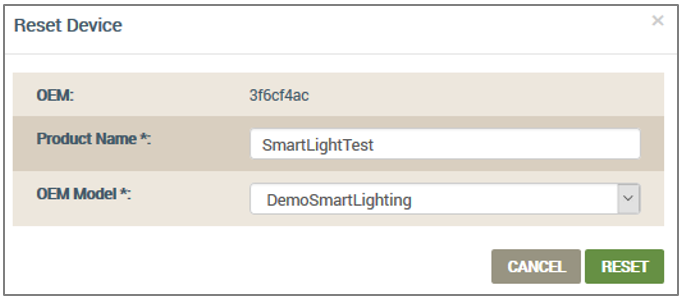
- Click RESET, which shows the Reset Device warning message in case you want to cancel.
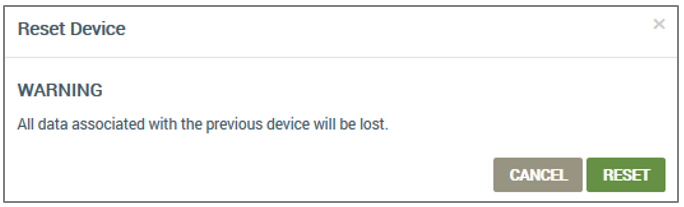
- Click RESET , which displays a confirmation (example shown below).
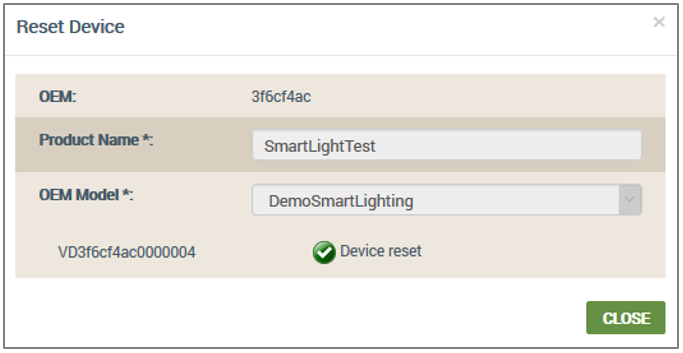
- Click CLOSE.
- Click the entry of the device on the Virtual Devices tab to open the Device page.
- Click here for instructions on viewing/editing devices from the All Devices tab.
See also: All Devices tab.
How to get here on the dashboard: Click Devices in the Navigation Panel, and then click the Virtual Device tab.
Please click here to let us know how we're doing. Thank you.